
Uploading Files
Upload the documents you want the agent to work with, such as contracts, correspondence, official notices, spreadsheets, or photos. Your uploads then appear in the Inputs section of the file panel.
How to upload files
There are three ways:
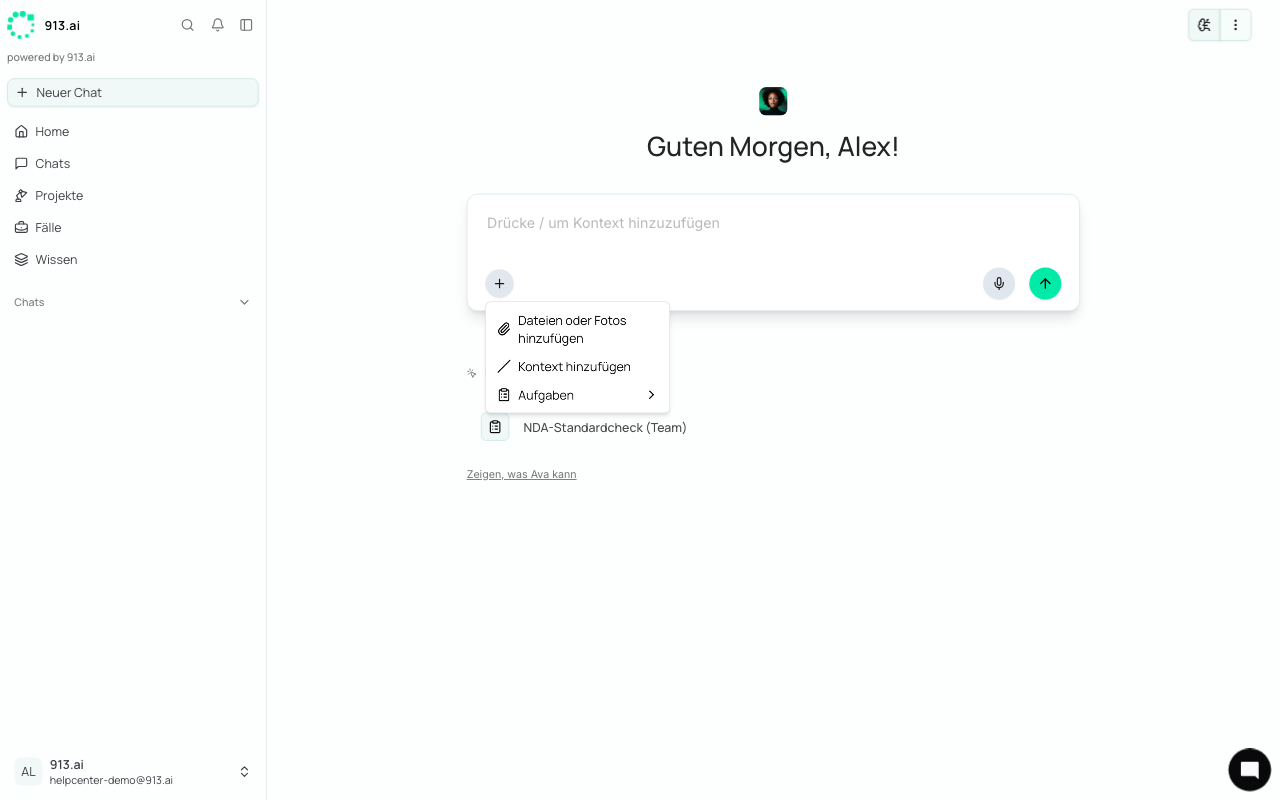
From the plus menu: Click + in the message field and choose Add files or photos.
With a keyboard shortcut: Ctrl + Shift + U (Windows) or ⌘ + Shift + U (Mac).
By drag and drop: Drag one or more files into the chat and drop them. Press Esc to cancel.
Then add your request and send the message. For example:
Review the attached service agreement for notice periods, price adjustment clauses, and limitations of liability. Summarize the risks for us as the client in a table.
Which files are supported?
In principle, any file type. The agent works best with these formats:
PDF (including scanned letters)
Word (DOCX), Excel (XLSX), CSV
PowerPoint (PPTX)
Outlook emails (MSG)
Images and photos
Text files
To see which files you can view directly in the chat, see Viewing Files.
File names
Characters that aren't allowed in file names (
/ \ : * ? " < > | %) are automatically replaced with_.If the chat already has a file with the same name, the new one gets a number, for example
Contract (2).pdf. Nothing is overwritten.
Good to know
Free plan: You can upload up to two files per chat.
Large files: The agent processes up to 200 MB per file and 300 MB per chat. If a file is larger, split it before uploading.
Files from Knowledge or a project don't need to be uploaded again. The agent finds them on its own. You can also point it to a specific file (see Mentioning Files in a Message).